
<<< Previous Lecture ––––––– Next Lecture >>>
So far, our physical output has been limited to controlling LEDs and small servo motors. With the Arduino we can control other devices also.
Artists working with robotics, Mechanics AND Kinetic sculptures
- Niklas Roy – Berlin-based artist working a lot with mechanical devices
- Teija ja Pekka Isorättyä – Finnish artist couple working with robotic installations
- Tim Hunkin – A engineer/artist who builds weird and elaborate machines. Also worked on making the Secret Life of Machines animation
- Jeppe Hein – Very minimalistic installations using kinetic elements
- ART+COM – A German design studio that specializes in creating big kinetic sculptures
- Ben Hopson – An industrial designer who has a lot of very interesting Kinetic Sketches on his website. Also this article might be of interest to you.
- Theo Jansen – Amazing wind-powered artificial creatures
- Jie Qi – Some interesting projects using muscle wire
Simple movements can make objects seem very alive.
This is a project by a contractor working with the US military. A huge drunken animal-robot that sounds like a chainsaw.
How to move things with the Arduino?
The Arduino outputs themselves are limited to only 5 volts and about 40 mA of current. That is really only enough to turn on some LEDs or very small motors. Even the 5V power pin can only provide 500mA of current. In order to control devices that require bigger voltage or current we have a couple of options.
Choosing the Right Motor for the Job (pages 249—>)
Transistors
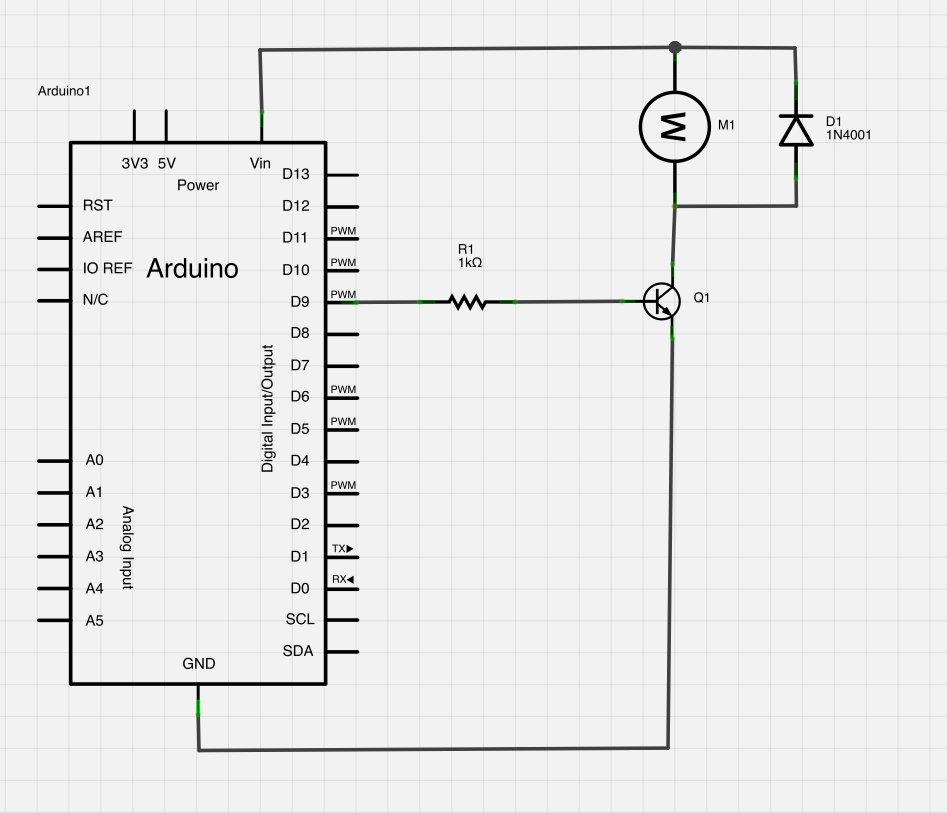
Transistors can be used as electronic switches that we can turn on and off with the Arduino.
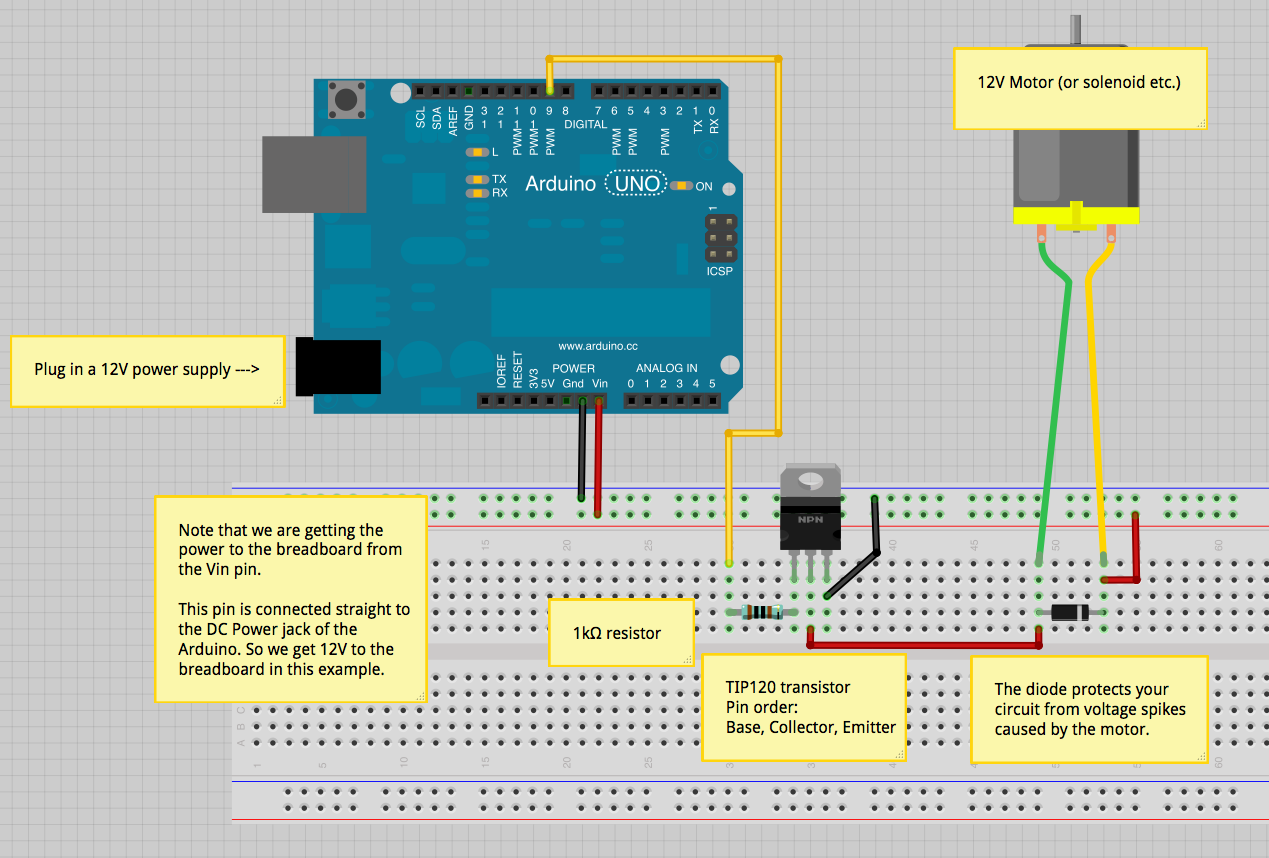
We will be using Darlington NPN transistors. A good basic one is TIP120 or TIP122. Or you might want to consider using a MOSFET if your device requires a lot of current, they don’t heat up as much as the Darlingtons.
With the TIP120 you could control any device that works with DC voltage up to 60V. We will stick with devices that are maximum 12V just to keep things little bit safer. Please consult Matti, if you are planning on working with transistors and higher voltage devices. Especially if you are not 100% sure in what you are doing.
This is how you connect the TIP120 transistor to your Arduino. You could replace the motor with any 12 V device. (a solenoid, small radio, LED strip etc.). The max current for the transistor is about 5 A, but I would recommend sticking with something smaller. Of course you also need to make sure your power supply can provide this much current.
In this example, you can use digitalWrite() or analogWrite() to control the motor. With the analogWrite() you can actually control the speed of the motor.
H-Bridges
The transistor only allows you to control a DC motor in one direction. If you want to change the direction, you could use an H-Bridge circuit.
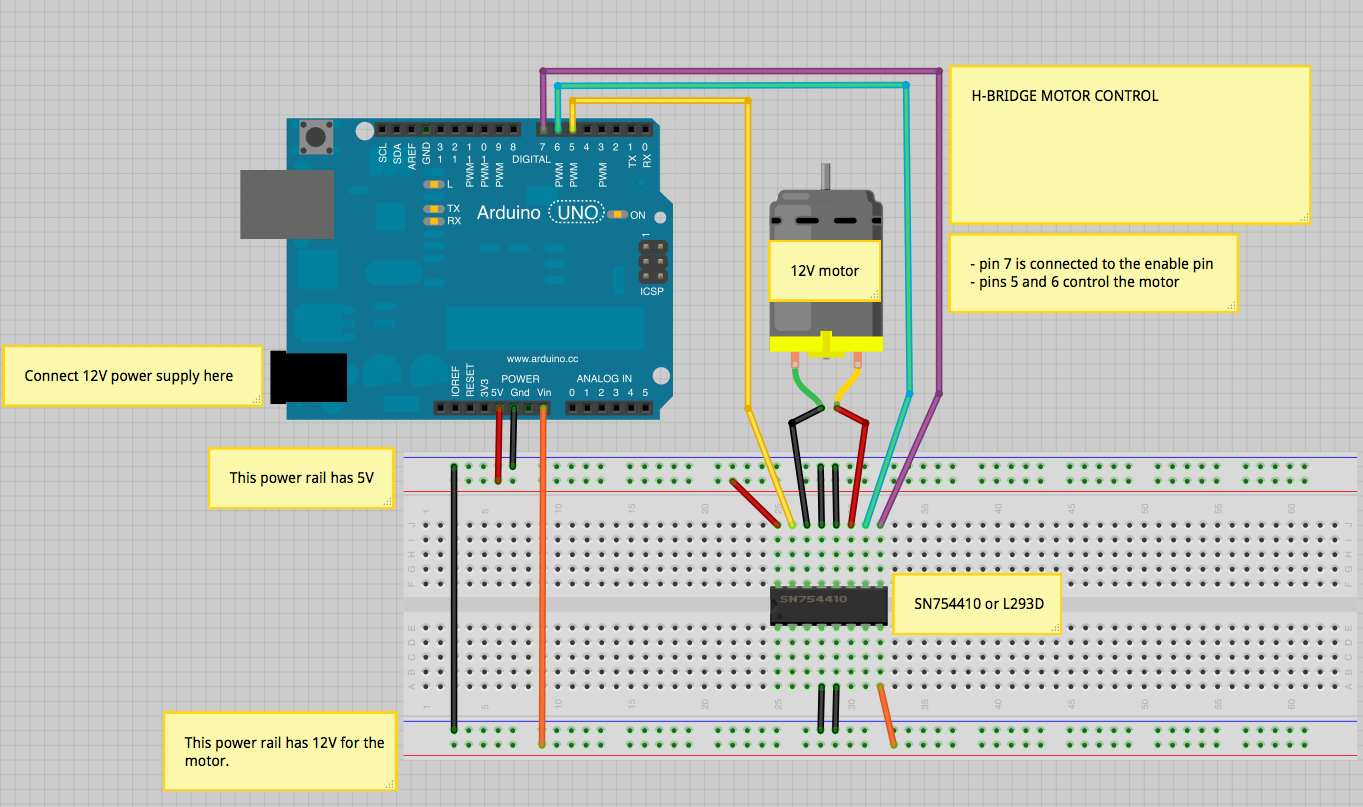
The enable pin that is connected to pin 7 on the Arduino controls the H-Bridge on/off. The pins 5 and 6 on the Arduino control the motor direction. This table will help you figure out how to control the motor.
| PIN 7 (ENABLE) | PIN 6 | PIN 5 | FUNCTION |
| HIGH | HIGH | LOW | Motor turns left |
| HIGH | LOW | HIGH | Motor turns right |
| HIGH | HIGH | HIGH | Motor stops |
| HIGH | LOW | LOW | Motor stops |
| LOW | HIGH/LOW | HIGH/LOW | Motor stops |
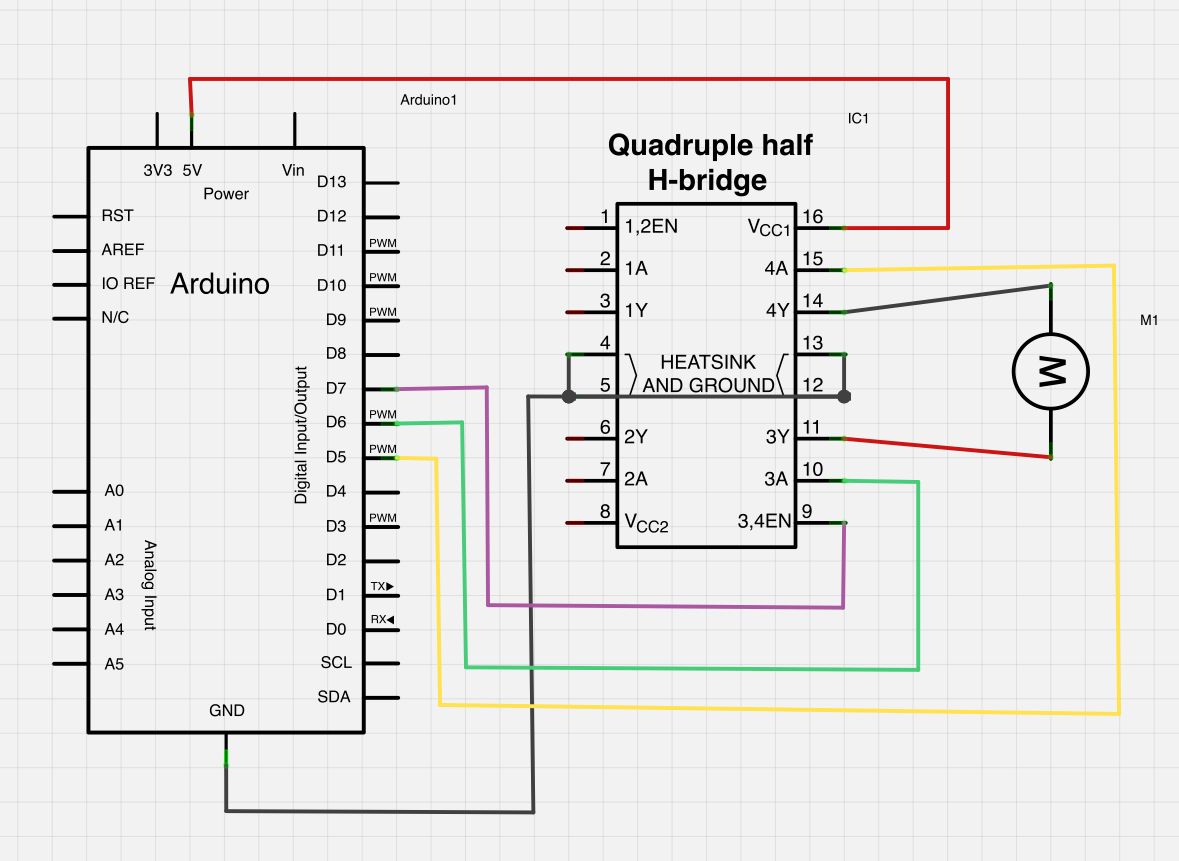
With the H-Bridge you can also control bipolar stepper motors.
Relays
Relays are electrically operated switches. A lot of them use electromagnets to activate a mechanical switch. When you turn the coil (electromagnet) on with a low-voltage signal, like from the output pin of an Arduino, the switch connects and the high-voltage signal has a path to travel.
Relays are useful in cases where you want to make sure that the low-voltage signal (Arduino) and the high-voltage (your load – lights, AC motors, etc.) are completely electronically separated.
NOTE! 230V IS POTENTIALLY LETHAL! DO NOT USE MAINS VOLTAGE IN YOUR PROJECTS UNLESS YOU KNOW 100% WHAT YOU ARE DOING. RELAYS CAN BE USED TO SWITCH MUCH SMALLER VOLTAGES ALSO.
Controlling stage lights (DMX)
We could of course set up solid-state relays to control lights that are connected to the mains voltage (230V AC), but that would mean a lot of work, especially if we would like to control more light than just one. Fortunately, we don’t have to, since dimmers and DMX-control for lights exists.
DMX (or DMX512) is a lighting control protocol used in theatre and stage lighting. It’s basically just a standardized protocol for controlling dimmers and other equipment that supports it. You can control hundreds of channels of lights in a fairly robust way. There are lots of different ways to send DMX-data from Processing or Arduino. Here’s a couple of them listed:
- DMX shield for Arduino
- DIY DMX Shield for Arduino
- Enttec DMX controllers
- Processing library to use with the DMX USB Pro from Enttec